Pentru a utiliza un nivel laser pentru gradare, setați nivelul laser pe un trepied, stabiliți o cotă de referință și apoi utilizați o tijă de gradare și un receptor laser pentru a compara fiecare punct cu referința fixă. Laserul proiectează un plan de referință invizibil; receptorul îl transformă în tonuri audibile care vă spun dacă să tăiați sau să umpleți. Nivelarea este pur și simplu procesul de modelare a terenului la o înălțime sau o pantă dorită, iar un nivel cu laser este cel mai rapid mod de a face acest lucru cu precizie.
Ce este gradarea cu laser și de ce să folosiți o nivelă cu laser?
Etalonarea cu laser folosește un nivel laser ca referință fixă a cotei pentru a ghida lucrările de excavare și umplere, înlocuind liniile de șir și nivelurile manuale cu bule cu un sistem de măsurare mai rapid, cu rază mai lungă. Un nivel cu laser permite unei persoane să stabilească gradul pe un teren mare, fără să tragă benzi sau să ghicească.
Principalele beneficii includ:
- Precizie mai mare pe distanțe de 30 de metri sau mai mult
- Operare cu o singură persoană, deoarece receptorul face ascultarea
- Referință consecventă pentru fiecare miză, astfel încât să evitați erorile cumulate
- Mai puține reluări atunci când trebuie să verificați gradul după excavare
Alegerea nivelului laser potrivit pentru gradare
Pentru majoritatea proiectelor de gradare, alegeți un laser cu autonivelare cu fascicul orizontal și un detector compatibil cu receptor, deoarece lumina soarelui exterioară face punctul vizibil greu de văzut dincolo de câțiva metri. Laserul nu trebuie să fie un laser cu grad rotativ dedicat; un nivel laser cu mai multe linii de calitate poate funcționa pe locuri rezidențiale mici atunci când este asociat cu un receptor.
Căutați aceste specificații atunci când selectați un laser pentru gradare:
- Interval de autonivelare de cel puțin 4 grade, astfel încât se recuperează după configurații dificile de trepied
- Precizie de 1/8 inch la 30 de picioare sau mai bună
- Un mod puls sau un mod receptor pentru utilizare în aer liber
- Un fascicul luminos (verde ajută la vizibilitate) pentru lucrări în interior cu lumină scăzută
- Carcasă durabilă și un compensator de blocare pentru transport
Pentru proiectele care necesită, de asemenea, alinierea formelor, a bazelor sau a pereților de sprijin, a Nivel laser cu autonivelare cu 12 linii vă oferă atât planuri de referință orizontale cât și verticale dintr-o singură configurație. Acest lucru elimină necesitatea de a roti instrumentul în mod repetat în timp ce setați colțurile și plăcile de nivelare.
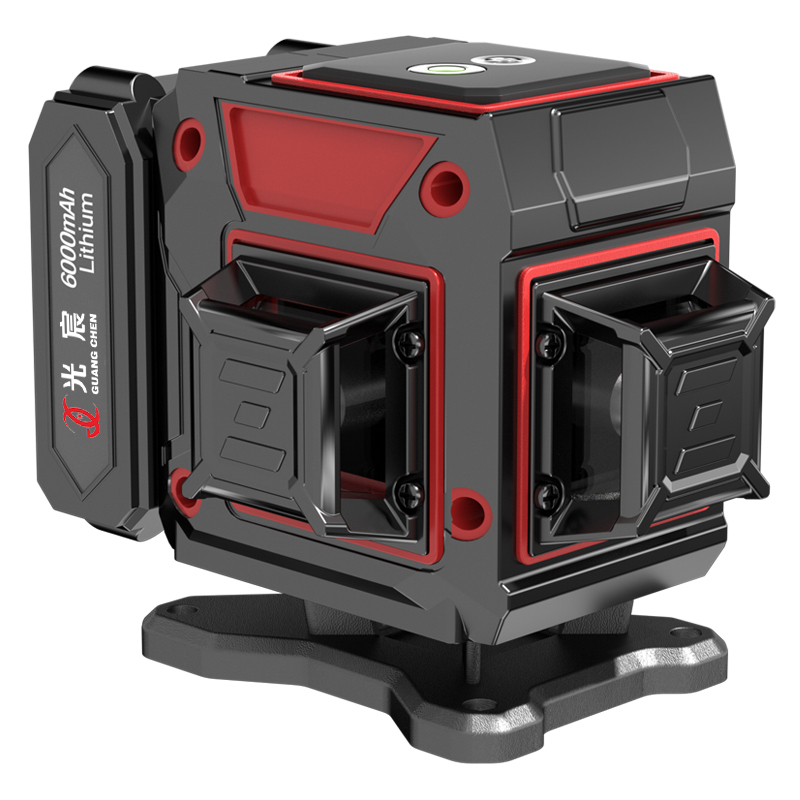 Producători de nivele cu laser verde personalizate de înaltă precizie 360° cu 12 linii, fabrică Jiangsu Guangchen Electronic Technology Co., Ltd este un producător de nivel de laser verde 3D, de înaltă precizie, 360°, cu 12 linii, și fabrica... Vizualizare produs →
 Echipamentul de care aveți nevoie pentru gradarea cu laser
Evaluarea cu succes cu laser necesită un nivel laser, un trepied, o tijă de gradare și un receptor/detector laser. Fără receptor, fasciculul este aproape invizibil în lumina zilei, astfel încât tija și receptorul nu sunt opționale pentru majoritatea lucrărilor în aer liber.
| Echipamente | Scop | Note |
|---|---|---|
| Nivel cu laser | Proiectează un plan de referință orizontal fix | Utilizați un model cu autonivelare pe un trepied stabil |
| Trepied | Ține laserul la înălțimea de referință dorită | Teren ferm; extinde picioarele în mod egal |
| Tijă de grad | Afișează altitudini în picioare, zecimi și sutimi | Numit și tijă de nivel sau toiag |
| Receptor laser | Detectează fasciculul și semnalizează tăierea/umplerea | Trebuie să fie prins de tija de grad și aliniat la laser |
Un receptor cu un suport magnetic și o reglare fină facilitează setarea unei cote precise. Unele receptoare afișează „high”, „on grade” și „low” cu LED-uri colorate și tonuri sonore, ceea ce este tot ce aveți nevoie pentru a direcționa un operator de excavator.
Cum să utilizați o nivelă laser pentru a evalua pas cu pas
Urmați acești cinci pași pentru a fotografia gradul cu o nivelă laser pe un site rezidențial sau comercial mic. Întregul proces durează aproximativ 10 minute pentru a se configura și apoi devine o rutină repetitivă de citire și răspuns.
- Configurați trepiedul și laserul. Așezați trepiedul pe un teren ferm și uscat și montați nivelul laserului. Porniți-l și așteptați ca acesta să se autoniveleze. Dacă instrumentul are o blocare a compensatorului, eliberați-l înainte de pornire.
- Stabiliți un punct de referință. Un punct de referință este un punct de cotă cunoscut, cum ar fi vârful unui stâlp de sondaj, o bordură sau o platformă de beton. Așezați tija de grad pe reper și poziționați receptorul astfel încât să înregistreze fasciculul. Înregistrați această citire a tijei ca cotă de pornire.
- Calculați nota țintă. Decideți cota finală dorită în raport cu punctul de referință. De exemplu, dacă aveți nevoie de o pantă de 1% pentru drenaj peste 50 de picioare, cota se schimbă cu 0,5 picioare (50 × 0,01). Adăugați această modificare la citirea de referință pentru a obține citirea tijei țintă.
- Verificați fiecare locație. Mutați tija de gradare în primul punct, țineți-o vertical la suprafața solului și verificați receptorul. Dacă receptorul spune „jos”, pământul este prea sus și trebuie să tăiați. Dacă scrie „mare”, trebuie să completați. Reglați receptorul în sus sau în jos până când semnalizează panta, apoi citiți valoarea tijei.
- Tăiați și umpleți la gradare. Excavați sau adăugați material până când citirea tijei în fiecare punct se potrivește cu ținta. Verificați din nou după compactarea sau mutarea materialului, deoarece compactarea modifică cota.
Pentru o discuție mai detaliată despre toleranța și tehnica de citire, consultați ghidul nostru despre utilizarea corectă a nivelului laser pentru a asigura acuratețea .
Pantă manuală vs. Lasere cu pantă automată
Dacă proiectul dvs. are nevoie de o pantă uniformă, cum ar fi 1% către o scurgere, puteți calcula fiecare citire manual sau puteți utiliza un laser rotativ cu o funcție de înclinare; un nivel laser de bază cu mai multe linii funcționează cel mai bine pentru planuri orizontale plate. Calculul manual este simplu pentru cursele drepte: înmulțiți procentul de pantă cu distanța orizontală pentru a găsi modificarea cotei.
De exemplu, o pantă de 2% peste 25 de picioare este egală cu 0,5 picioare de cădere. Folosește o tijă și un receptor pentru a seta acea picătură la fiecare miză. Laserele automate de pantă reduc calculul, dar costă mai mult și sunt de obicei instrumente rotative construite pentru construcții de șantier grele. Pentru majoritatea sarcinilor de clasificare a proprietarilor de case și a antreprenorilor mici, calculul manual dintr-un plan orizontal nivelat este suficient de precis.
Sfaturi de precizie și greșeli frecvente
Cele mai multe erori de clasificare provin de la un trepied instabil, un laser necalibrat sau de la mișcarea accidentală a receptorului în timpul ajustării. Verificați calibrarea nivelului laser la începutul fiecărei zile și restabiliți valoarea de referință de fiecare dată când mutați trepiedul.
| greseala | Soluție |
|---|---|
| Amplasarea trepiedului pe teren moale sau în pantă | Folosiți un teren solid, împingeți picioarele și renivelați după configurare |
| Nu permite laserului să se autoniveleze complet | Așteptați ca rotirea sau bipul să se oprească înainte de a efectua citiri |
| Citirea greșită a tijei de grad deoarece receptorul nu este vertical | Țineți tija la plumb și mențineți receptorul aliniat cu laserul |
| Ignorarea efectelor temperaturii pe curse lungi | Verificați din nou punctele critice dacă tija este expusă la căldură sau dacă laserul a fost mișcat |
| Utilizarea unui laser fără receptor în aer liber | Adăugați un receptor/detector; fasciculul liber este invizibil în soarele strălucitor |
Dacă acoperiți o zonă largă, a Nivel laser cu 16 linii furnizează suficiente linii de referință pentru a verifica atât alinierea orizontală, cât și verticală, fără a muta instrumentul, economisind timp în planurile complexe de gradare.
 Producători de nivele cu laser verde personalizate de înaltă precizie 360° cu 16 linii 4d, fabrică Jiangsu Guangchen Electronic Technology Co., Ltd este un producător de nivel cu laser verde 4D de înaltă precizie la 360° cu 16 linii și fabrica... Vizualizare produs →
 Întrebări frecvente
Cele mai frecvente întrebări de gradare cu laser implică vizibilitatea receptorului, precizia, marcajele tijei și calculele pantei.
Pot folosi o nivelă laser de interior pentru gradarea exterioară?
Da, dar numai dacă are un mod de impuls sau receptor, deoarece fasciculul vizibil roșu sau verde nu este vizibil pe o tijă de grad în lumina directă a soarelui. Majoritatea laserelor cu autonivelare au acest mod încorporat; verificati specificatiile inainte de a comanda.
Cât de precis este un nivel laser pentru gradare?
Un nivel laser cu autonivelare tipic are o precizie de aproximativ 1/8 inch la 30 de picioare, ceea ce este suficient pentru drenaj, amenajări și suporturi mici de fundație. Pentru curse mai lungi, precizia scade, așa că utilizați un laser rotativ pentru distanțe de peste 100 de picioare.
Am nevoie de o lansetă specială?
Orice tijă rigidă cu marcaje clare în zecimi de picior funcționează, dar o tijă cu un suport de recepție încorporat și un buton de reglare fină accelerează lucrul. Zecimile complete sunt mai ușor de citit decât inci atunci când se calculează panta.
Pot folosi un nivel laser pentru a seta o pantă de 1%?
Da, dacă calculați modificarea de altitudine pe distanță și apoi setați receptorul de pe tijă la schimbarea respectivă. De exemplu, 1% peste 10 picioare este 0,1 picior; mutați receptorul în sus sau în jos corespunzător.
Stăpânirea gradării cu laser se rezumă la trei obiceiuri: nu aveți încredere niciodată într-un trepied instabil, începeți întotdeauna de la un punct de referință cunoscut și verificați din nou după fiecare trecere. Cu un laser cu autonivelare, un receptor și o tijă de gradare, puteți tăia fundul șanțurilor, puteți fixa perne și puteți modela șirzi pentru a exact panta în loc să ghiciți cu ochii.